Getting Started
Welcome to GradeMaster!
GradeMaster is a powerful grade management system that helps educators efficiently track student performance, manage assessments, and generate comprehensive reports.
GradeMaster Dashboard Overview
Class Management
Create and organize multiple classes with ease
Student Tracking
Add students with automatic ID generation
Analytics
View detailed performance analytics
Export Data
Export grades to Excel format
Quick Start Guide
Setup Data Storage
Choose between file system or browser storage
Create Your First Class
Set up a new class to organize your students
Add Students
Register students with automatic ID assignment
Create Assessments
Set up tests and assignments
Enter Marks
Record student performance efficiently
Data Setup
Important: You must complete data setup before using GradeMaster.
Data Setup Modal

Managing Classes
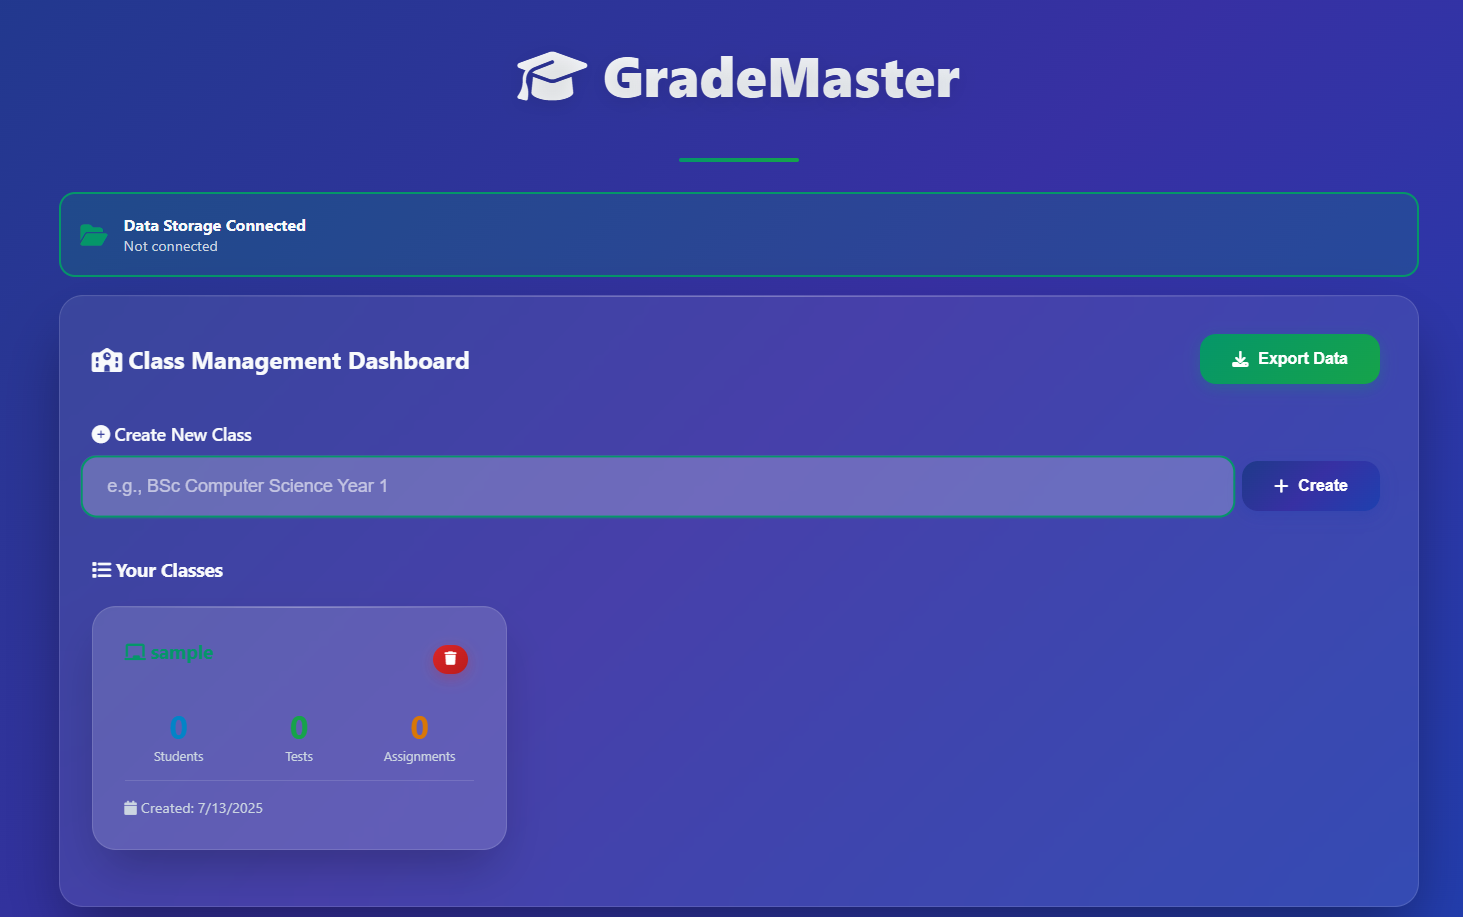
Class Management Interface
Creating a New Class
Navigate to Dashboard
From the main dashboard, locate the "Create New Class" section
Enter Class Name
Type a descriptive name (e.g., "BSc Computer Science Year 1")
Click Create
Press the "Create" button to add the class
Class Dashboard Overview
Student Count
Total number of registered students
Tests
Number of tests created
Assignments
Number of assignments created
Tip: Use descriptive class names that include subject, year, and section for easy identification.
Student Management
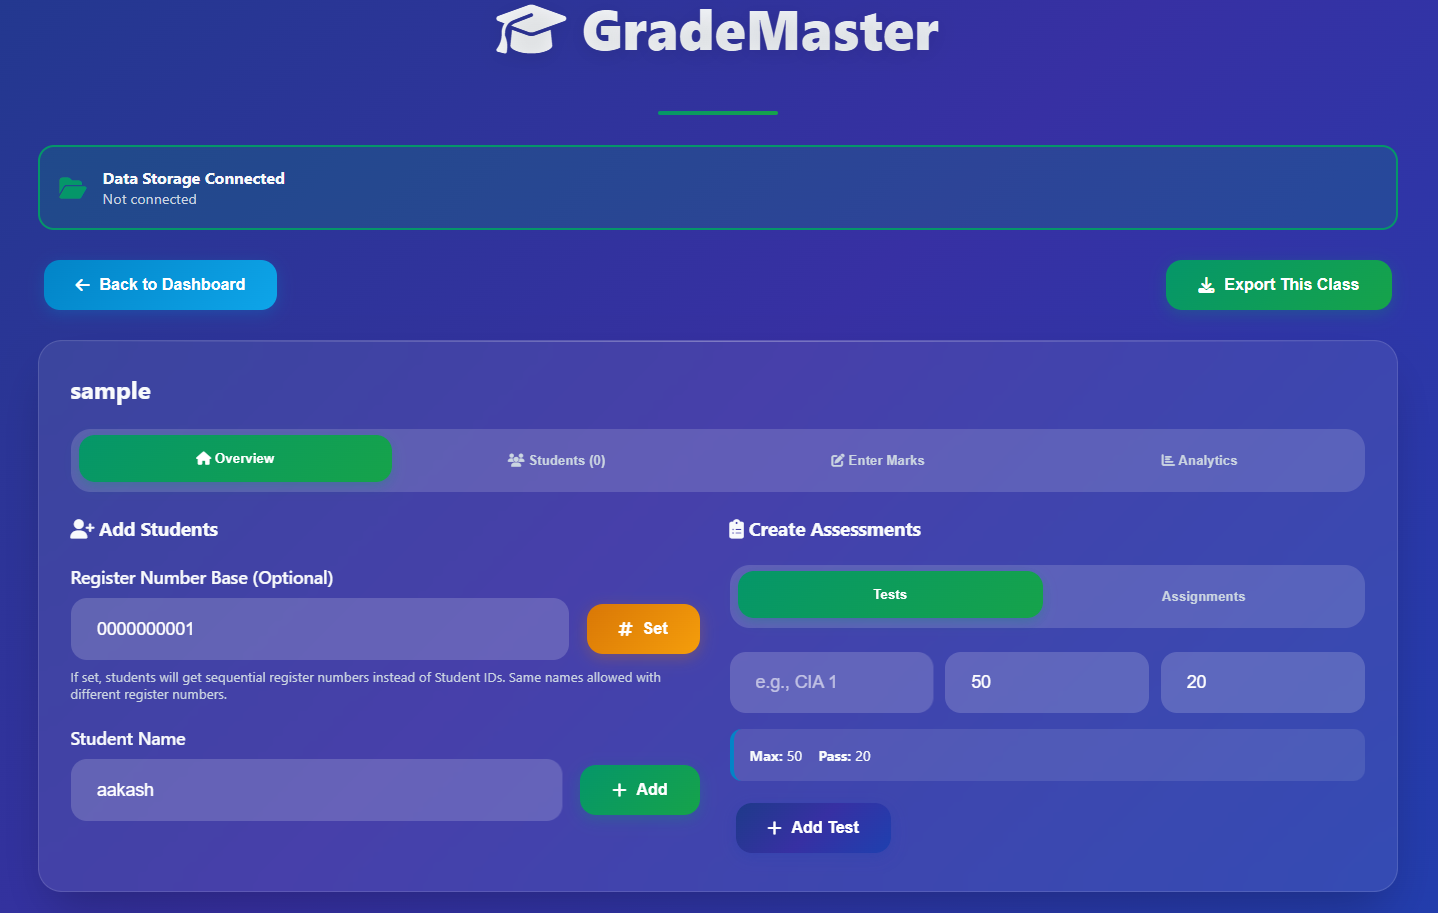
Student Management Interface

Adding Students
Access Overview Tab
Click on a class, then navigate to the "Overview" tab
Enter Student Name
Type the student's full name (letters, spaces, and dots only)
Add Student
Click "Add" or press Enter to register the student
Register Number System
Setting Up Register Numbers
Instead of Student IDs, you can use sequential register numbers:
- Enter a base number (e.g., 2313222180250001)
- Students get sequential numbers automatically
- Same names allowed with different register numbers
Base: 2313222180250001
Student 1: 2313222180250001
Student 2: 2313222180250002
Student 3: 2313222180250003
Student Profile Features
Click any student to view their complete academic record
Use the search bar to quickly find students by name
Remove students using the delete button (this also removes their marks)
Creating Assessments
Assessment Creation Interface
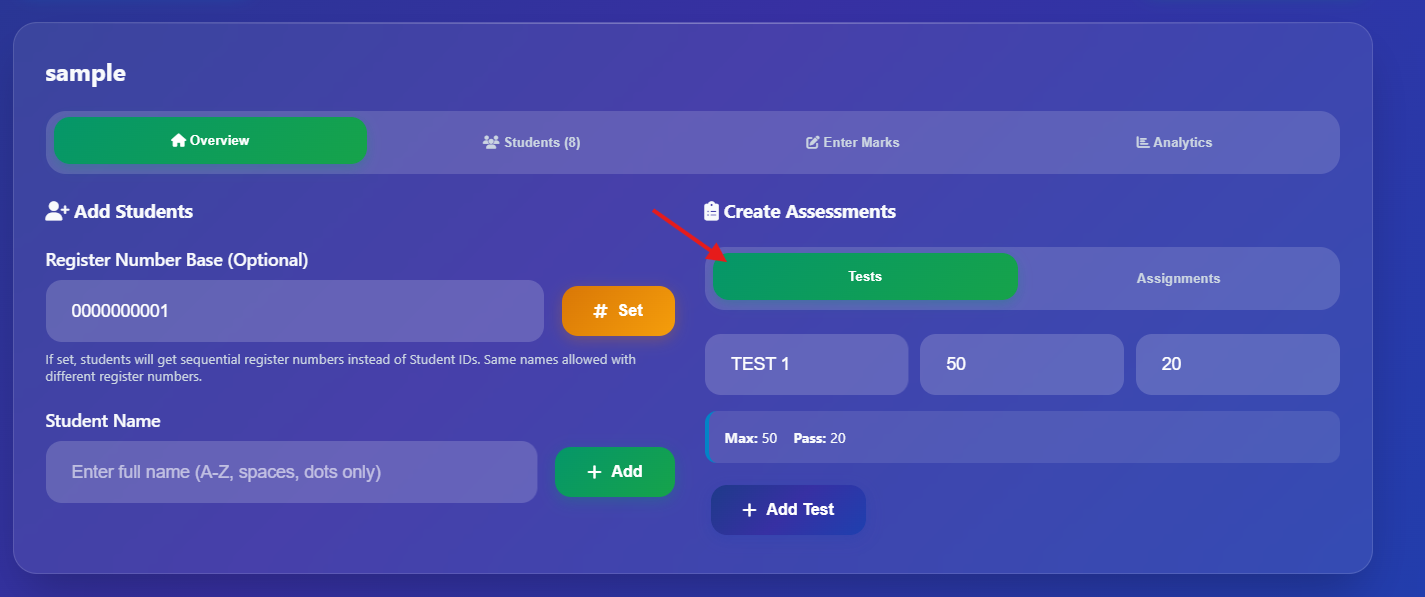
Tests
How to Create:
- Go to Overview tab
- Select "Tests" tab in assessments
- Enter test name (e.g., "CIA 1")
- Set maximum marks (default: 50)
- Set pass marks (default: 20)
- Click "Add Test"
Features:
- Custom max marks
- Custom pass marks
- Pass/Fail status
- Absence marking
Assignments
How to Create:
- Go to Overview tab
- Select "Assignments" tab in assessments
- Enter assignment name
- Click "Add Assignment"
Features:
- Fixed 10 max marks
- Pass/Absent only (no fail)
- All marked assignments are "Pass"
- Simple grading system
Tip: Use descriptive names for assessments like "Midterm Exam", "Lab Assignment 1", or "Final Project" for easy identification.
Entering Marks
Marks Entry Interface
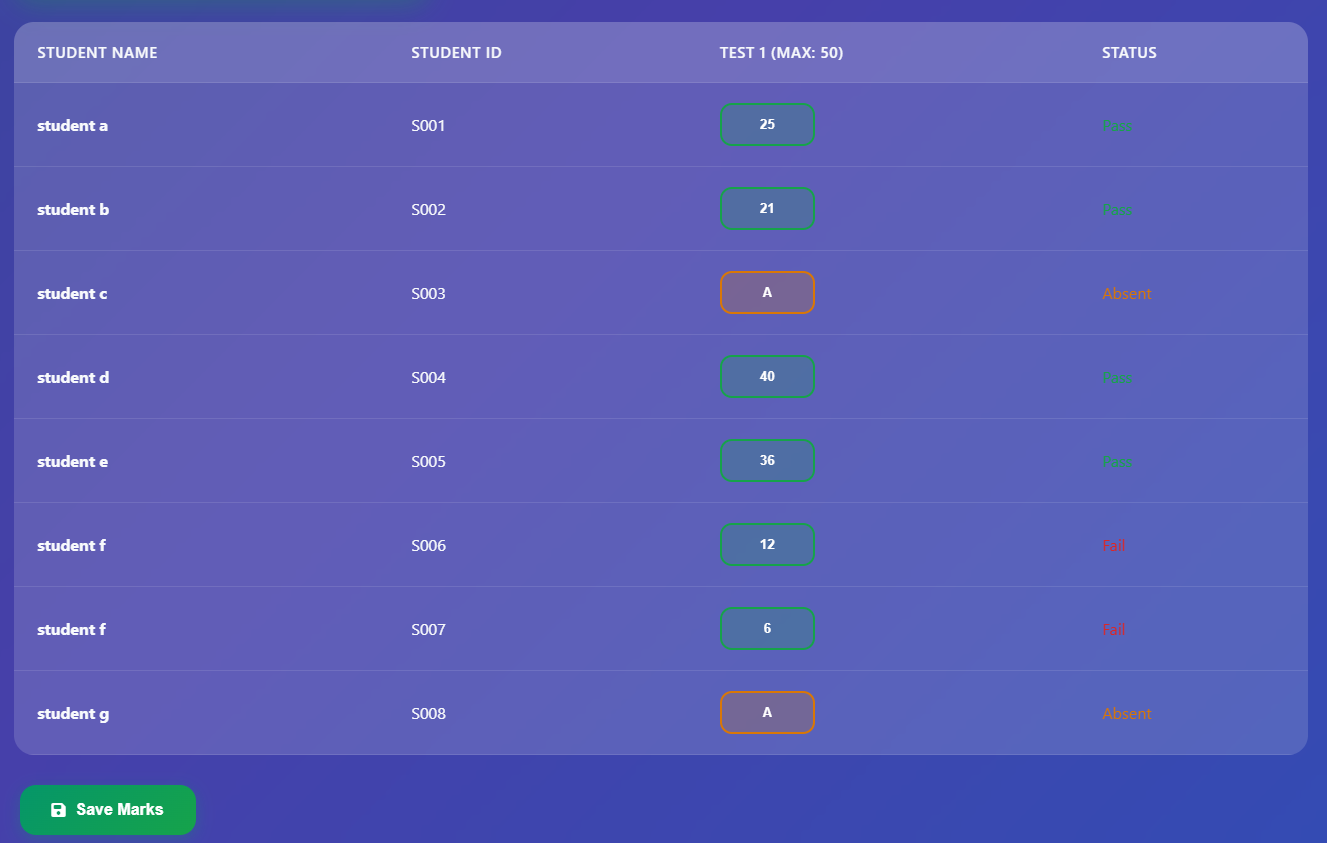
Marks Entry Process
Navigate to Marks Tab
In your class, click on the "Enter Marks" tab
Select Assessment
Click on the assessment you want to grade
Enter Marks
Type marks for each student or "A" for absent
Save Progress
Press Enter to move to next student or click "Save Marks"
Marking Guidelines
For Tests
- Enter numerical marks (0 to max marks)
- Type "A" for absent students
- Status automatically calculated (Pass/Fail)
- Based on pass marks threshold
For Assignments
- Enter marks 0-10
- Type "A" for absent students
- All marked assignments are "Pass"
- No fail status for assignments
Keyboard Shortcuts
Move to next student
Mark as absent
Enter marks
Analytics Dashboard
Analytics Dashboard
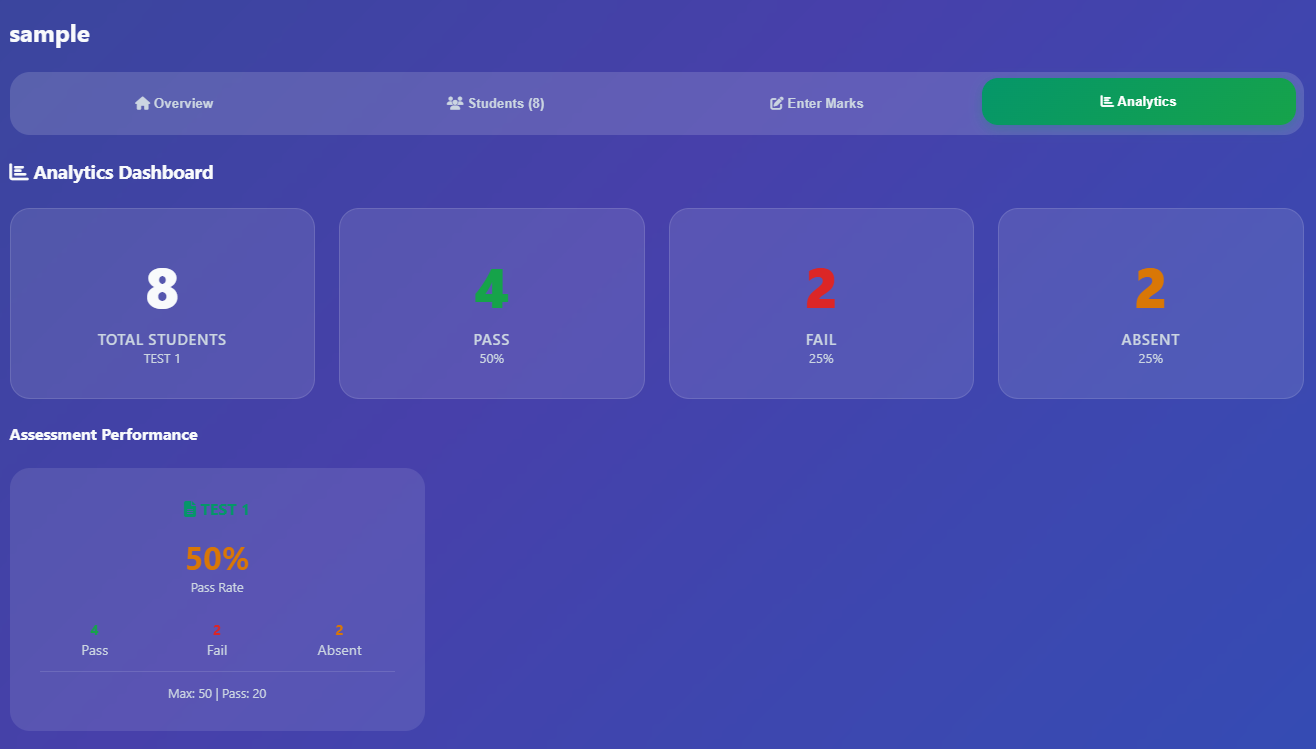
Viewing Analytics
Click on the "Analytics" tab in any class to view performance data.
Pass Rates
View pass/completion rates for each assessment
Student Statistics
See total students, passes, fails, and absences
Performance Trends
Track student performance across assessments
Understanding Analytics
Assessment Performance Cards
- Pass Rate: Percentage of students who passed
- Completion Rate: For assignments (all marked = completed)
- Color Coding: Green (≥70%), Yellow (≥50%), Red (<50%)
Student Profile Analytics
- Tests Passed: Number of tests with passing marks
- Assignments Done: Number of completed assignments
- Total Absent: Number of absences across all assessments
- Success Rate: Overall performance percentage
Exporting Data
Export Data Interface
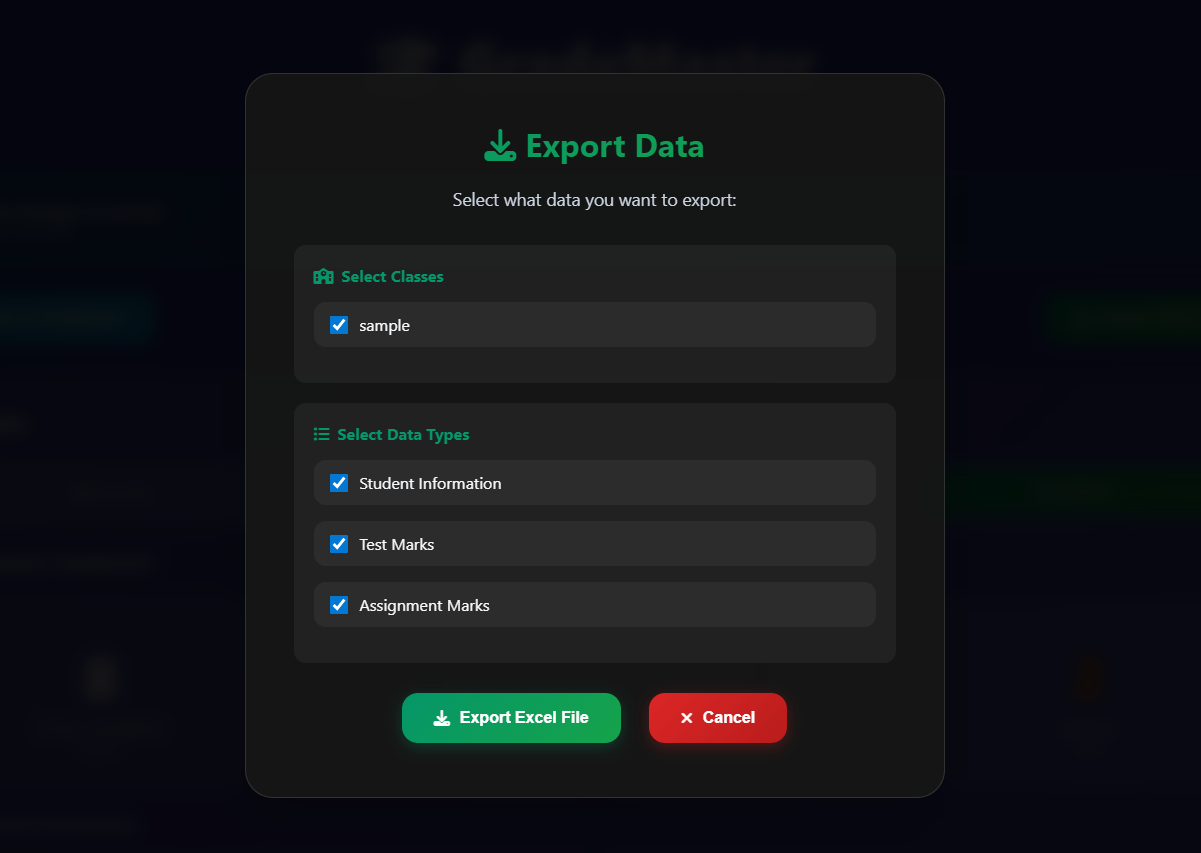
Export Options
Export Process
Select Classes
Choose which classes to include in the export
Choose Data Types
Select what data to include:
- Student Information
- Test Marks
- Assignment Marks
Generate Excel File
Click "Export Excel File" to download your data
Excel File Structure
Separate Sheets
Each class gets its own sheet in the Excel file
Column Layout
Student ID/Register No | Student Name | Assessment Marks
Mark Display
"Absent" for absences, "Not Given" for ungraded, numerical marks otherwise